|
Your first web page with HTML
So far you've learned different aspects of HTML and basic
things like how to make table, rows, columns, how to insert image, url, how
to work with different tags, attributes and so on. Ok let's put together all
our knowledge whatever we've learned so far and try to make our first page.
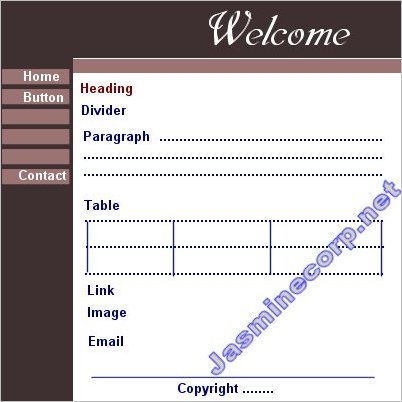
Here is our template for our page. So finally when you've done with it page
should look like this in your browser.
1. Open your Notepad. For this click on Start menu
(bottom left) - Programs - Accessories - Notepad
2. First we've to write our basic html code. Ok so type this code in your
Notepad (you may need to save your work frequently to look into your browser)
or you can use our feature
Practice HTML too.
|
Here is a Basic HTML code
<html>
<head>
<title>
title
</title>
</head>
<body>
contents
</body>
</html>
|
3. Now let's put our page title something like this "My
First Page".
|
Add title
<html>
<head>
<title>
My First Page.
</title>
</head>
<body>
contents
</body>
</html>
|
Now we need basic layout of the page. So we'll need to make
a table. In template you can see a heading, side menu
and main content page. So we'll need table of atleast two columns and two rows.
This table will go inside the <body> </body>
tag.
4. So let's add table tags at the place of contents.
For table basics look here.
|
Add basic tag of table
<html>
<head>
<title>
My First Page.
</title>
</head>
<body>
<table>
<tr>
<td>
</td>
</tr>
</table>
</body>
</html>
|
Here you can see we've added basic <table> tag with <tr>
and <td> and closing tags.
5. Let's put table border and width of table so that it could be easier to view
in browser.
|
Add table
<html>
<head>
<title>
My First Page.
</title>
</head>
<body>
<table border="1"
width="100%">
<tr>
<td>button</td>
</tr>
</table>
</body>
</html>
|
Your table should look like this in your browser.

As per our template we need to make columns for side Menu
and we've to add Welcome heading on top.
6. Add one more <td> Welcome
</td> Now your table has two columns.
7. Add width in first <td width="20%">
and <td width="30%">
in second <td> to determine the width of different table columns. Adjust
width according to your page need/length of your button or text. I've given
20% and 30% just for an example. You can use pixel width too.
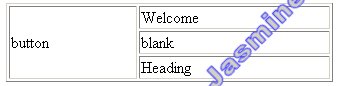
8. Add two rows in Welcome column. <tr><td>blank</td></tr>and
</tr><tr><td>Heading</td></tr>
Your column looks little weird in browser right!! Let's add rowspan to make
it correct.
9. Add rowspan in <td rowspan="3">
|
Add table column and width
<html>
<head>
<title>
My First Page.
</title>
</head>
<body>
<table border="1"
width="100%">
<tr>
<td width="20%"
rowspan="3">
button</td>
<td width="30%">Welcome
</td> <tr><td>blank</td></tr><tr><td>Heading</td></tr>
</td>
</tr>
</table>
</body>
</html>
|
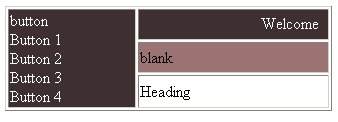
Now your table should look like this. All
the button should go on left side menu with button and all the text should go
under Heading.
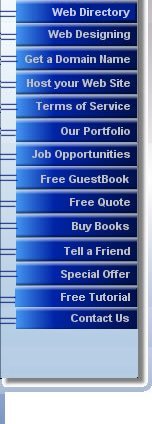
10. Add more button underneath button text. <br>Button
1<br> Button 2<br>Button 3<br> Button 4 you
can add as many as buttons according to your need.
Make sure to separate them with <br> tag.
11. Add bgcolor in <td bgcolor="#3E3030">
of welcome. Look into browser your Welcome title disappeared right? Need
to add font with it <font color="white">
Make sure to add closing tag
</font>. You can also add font size, face etc.
12. Repeat the same process with left side menu button. Add bgcolor and
font.
13. Add bgcolor <td bgcolor="#9B7373">
in <td> of text 'blank'
14. Add <h2> </h2>
heading tag with text "Welcome" to make
it bold and big. To align it on right side of the page add <align="right">
in <td>
Note: Every time when you make
a new change save it and look into your browser. That's how you will learn it
easily. If you are learning in Practice HTML every
time click on text to see changes.
|
Add more buttons, background color
and text color
<html>
<head>
<title>
My First Page.
</title>
</head>
<body>
<table border="1"
width="100%">
<tr>
<td width="20%" rowspan="3" bgcolor="#3E3030"><font
color="white"> button<br>Button
1<br> Button 2<br>Button 3<br> Button 4</font></td>
<td align="right" width="30%"
bgcolor="#3E3030"><font
color="white"> <h2>Welcome</h2>
</font>
<tr><td bgcolor="#9B7373">blank</td></tr><tr><td>Heading</td></tr>
</td>
</tr>
</table>
</body>
</html>
|
Now your table layout should look like this.
Note: I've showed current changes
in bold or text red/green color in html code area.
15. Your button text shows up in the middle of the page?
Let's align it on top of the page. Add <valign="top">
in <td> of button text.
16. We do not need text 'blank' so you can write
instead of it. is used for non-breaking space.
17. Now at this point add Heading tag <h3></h3>
with text heading to give it a bolder look. Add font color also.
18. Now all the contents will go under the Heading text. Make sure that all
the content should go inside closing </td>Look
at the template now we need to add a divider under text Heading.
19. Add divider <hr width="200">
20. Add paragraph. <p></p>
21. According to template now add Table. Here is the basic table tag
<table><tr><td></td></tr></table>
a. Add table basic tag
<table><tr><td>row 1/col 1</td></tr>
</table>
b. add row 2 in basic tag but before </table>
<tr><td>row 2/col 1</td></tr>
</table>
c. add column 2 & 3 of first row. Both <td></td> will go after
first <td></td>
<table><tr><td>row 1/col 1</td>
<td>col
2 </td>
<td>col 3</td>
</tr>
d. Add second row of col2 and col3 . Repeat
the same procedure with (Row 2/col 1).
The whole code should be like this:
<table>
<tr><td>row
1 / col 1</td><td>col
2</td><td>col
3</td></tr>
<tr><td>row
2 / col 1</td><td>col
2</td><td>col
3</td></tr>
</table>
Little confusing :) The more you practice it, it will more clear.

22. Add link. <a href="link.htm">Link</a>
The similar way link/URL should be added to button.
Url must be valid one. Here we are just using dummy
link.
23. Add image <img
src="image.gif"> It is just an example.
Image should have valid path/address to show up in browser.
Learn more about images in detail here.
24. Add Email address. <a
href="mailto:anita@yahoo.com">
25. Add simple line with the help of minus key of keyboard.
26. Add copyright notice. ©
|
Add heading
<html>
<head>
<title>
My First Page.
</title>
</head>
<body>
<table border="1"
width="100%">
<tr>
<td valign="top"
width="15%" rowspan="3" bgcolor="#3E3030"><font
color="white"> button<br>Button 1<br>
Button 2<br>Button 3<br> Button 4</font></td>
<td width="80%" bgcolor="#3E3030"><font color="white"><h2>
Welcome </h2></font>
<tr><td bgcolor="#9B7373"> </td></tr><tr><td><h3><font
color="#800000">Heading</font></h3>
<!-- Add divider -->
<hr width="200">
<!-- Add Paragraph-->
<p>HTML is a very
essential part of web designing. If you want to master web designing,
drawing tables, adding pictures etc. this tutorial is a must. If you do
not know how to use HTML codes in your web site this tutorial will teach
you in easy steps. This tutorial will walk you thru with the help of lots
of demo and step by step instruction. </p>
<!-- Add table-->
<table border="1"
width="75%"><tr><td>row
1 / col 1</td><td>col
2</td><td>col
3</td></tr>
<tr><td>row
2 / col 1</td><td>col
2</td><td>col
3</td></tr></table>
<!-- Add breaking space--><br><br>
<!-- Add URL/link-->
<a href="link.htm">Link</a>
<!-- Add breaking space--><br><br>
<!-- Add Image-->
Image <img src="image.gif">
<!-- Add breaking space-->
<br>
<!-- Add Email link-->
<!-- Add breaking space--> <br>
<a href="mailto:anita@yahoo.com">Email
Me</a>
<!-- Add breaking space-->
<br>
<p align="center">________________________________________________
<br>
<!-- Add breaking space-->
<br>
<!-- Add copyright-->
Copyright ©
2003 Jasmine Computers Inc.</p>
</td></tr> </td>
</tr>
</table>
</body>
</html>
|
Now your page layout should look like this.
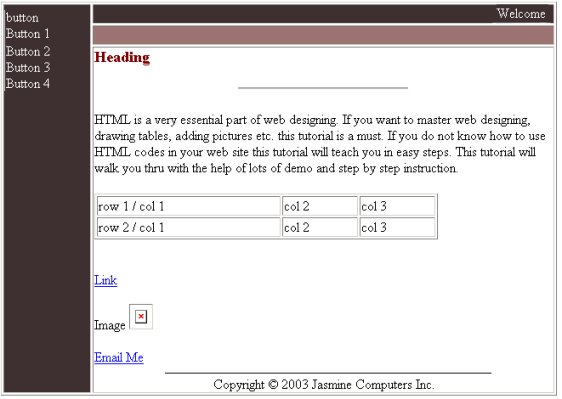
Some finishing touch is still needed.
Assignment: Please make these changes
in your code.
1. The first column of inside table is bigger than other two columns. Need to
make that adjustment by decreasing/increasing <td width>
2. Add <font></font> tags to change the look of text color,
size, face etc. (Note: you can do it side by side when you add text, paragraph
etc.)
3. Align "Heading" text at the center of the page.
4. Remove border from main table. <table border="0">
5. Add <cellpadding="10"> in main table tag to create
space between table border and text.
6. Add Welcome image and button instead of text. Please download these images.


Try this Assignment first if you are not able to solve it find Solution here.
--------------------------------------------------
|